Abra Instructions
How to put on your Abra
If you’ve lost the instructions that came with your ABRA, you can refer to these.
1. For best adhesion, clean your chest area with soap or exfoliant, rinse thoroughly and dry well. Apply your Abra within the hour. AVOID moisturizers, powders, oils etc. anywhere on or near the chest or hands prior to applying your Abra.
2. Connect the font closure. Look for the pointy side of the cups and form a “V” in the centre with a straight line at the base with the points up. This will be the position of your Abra when you’re done. (pic 1)
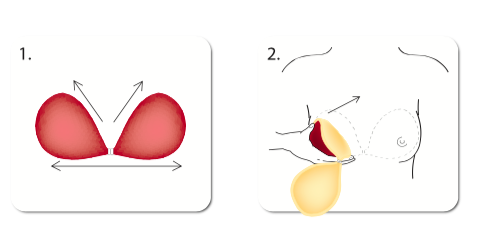
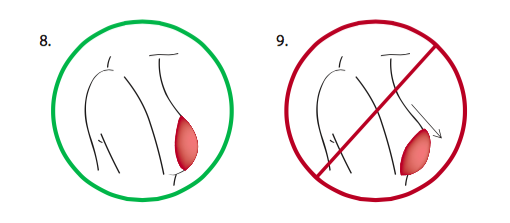
3. Apply the cups one at a time: In front of a mirror, flip one cup outward while holding it by the edges (pic 2). Apply on the lower part of the breast below the nipple but NOT underneath the breast. Very important for sizes C and up as well as lower positioned breasts. Don’t try to position the nipples in the centre of the cups – as long as they are covered its correct.
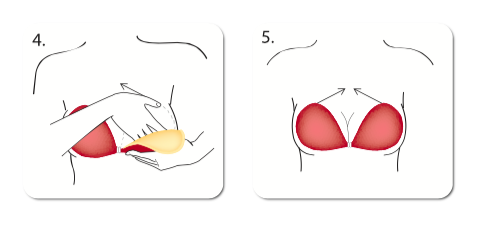
4. IMPORTANT: The central edge of the first cup you apply should be a vertical line (pic 3). It will shift into a “V” after applying the second cup.
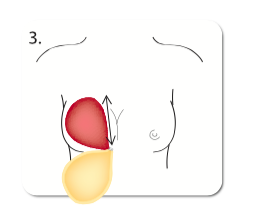
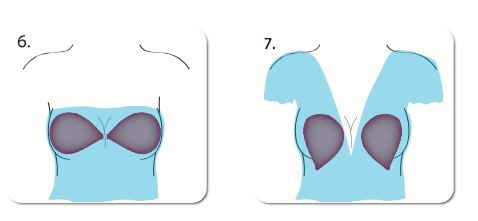
5. Apply the second cup by squeezing in and up in a diagonal motion (pic 4-5). More squeezing gives you more cleavage. You decide based on your occasion. The tension between the cups gives you both support and cleavage.
TIPS:
- For low-cut look see pic 6. For deep V-neck look see pic 7. Adjust the bra accordingly.
- To see the true results, put your top on after you adjusted your Abra. The bra alone may look odd as it doesn’t cover the whole breast. See your results with your top on.
- Your Abra should be positioned in a manner that holds your breast rather than follow its shape.
WASHING:
Regular washing is important to keep the tackiness of the adhesive. Hand-wash using only warm/hot water and liquid dish soap to remove any body oils that may clog the adhesive. Use the palm of your hand in a circular motion to clean. Rinse in warm/hot water and hang to dry. Air dry only – do not use towel to dry.
Once dry, store your Abra in its original packaging and apply the plastic cling wrap on the adhesive to protect it from dust and lint.

